

how to fix a blown head gasket without replacing it
If you suspect you've got a blown or leaky head gasket, you may have more options than you think. Replacing a blown head gasket isn't necessarily a complicated procedure. However, it can be costly and time consuming. Luckily, everything you need to know is right here! If you're asking yourself " how do I fix a blown head gasket ?" just keep reading below. We'll walk you through the process and even share some tips that may help you prevent a blown gasket or stop a leaky gasket right in its tracks. Before you spend thousands of dollars replacing your gasket, try our head gasket sealer . Designed for both Diesel and gasoline engines, BlueDevil head gasket sealer is the perfect solution for sealing leaks in cracked head gaskets, warped or cracked heads, heater cores, and freeze plugs.
Head Gasket Sealer
How Do I Fix a Blown Head Gasket at Home?
Lengthy procedures like replacing a blown head gasket can flummox even the most seasoned weekend mechanics. There are a number of parts you'll have to remove and, since the process usually can't be completed in one sitting, you'll have to remember a lot of small details for a few days, or perhaps even over the work week.
The head gasket replacement procedure we'll discuss in this article will have a few tips and tricks for accomplishing this long procedure without forgetting any crucial parts or steps along the way.
Blown Head Gasket Repair Cost
Now that you've assessed your car's symptoms and have decided that you want to replace your blown gasket, you'll need to get all of the necessary replacement parts and right kind of head gasket. This can be a costly endeavor that typically ranges from $1000 to $2000 dollars. Before looking for a blown head gasket repair kit, try our head gasket sealer as a simple solution that could potentially save you thousands of dollars! Follow these guidelines and you'll be back on the road in no time at all:
- Remove thermostat and flush the cooling system
- Fill the system with water
- Add BlueDevil Head Gasket Sealer slowly to the radiator as the vehicle idles
- Install the radiator cap and allow the engine to idle for at least 50 minutes
- Completely drain the cooling system, install a new thermostat and fill the system with the correct amount of coolant
Read the full directions here . Alternatively, continue reading below to find out how to replace your blown gasket at home!
Step 1: Remove the Battery Cables
The basic procedure for fixing any blown head gasket is similar for most motors. If your engine has overhead cams, it adds a little complication, but we'll cover that in the last few steps. The first step in almost any repair procedure for your car is to disconnect your battery cables. This opens the electrical circuit and will make sure you don't have any arcing or sparking during your job. This will also prevent you from accidentally starting your vehicle's engine while it's taken apart.
Step 2: Drain the Coolant
Next, you'll want to drain the coolant. Your car's coolant surrounds the engine block and head. So, if you don't drain it, you'll end up with a mess and water in your engine oil. Make sure to use the radiator and block drain to remove all the coolant.
Step 3: Disconnect Electrical Components
Now, we recommend disconnecting any electrical connectors that will get in the way of removing the head. This will include temperature sensors, injector clips, spark plug wires, coils, and any other wires that cross over the head.
Step 4: Remove the Intake and Exhaust Manifolds
This can includes removing a significant amount of intake and exhaust piping. So, take your time. Our rule of thumb is to remove as much as you can in this step to give yourself more room to work. We've got some handy tips and tricks below to make this part easier.
Once the intake and exhaust manifolds are removed you need to remove your timing chain or belt if your vehicle has overhead cams. If not, you can skip this step. You're now ready to remove the cylinder head!
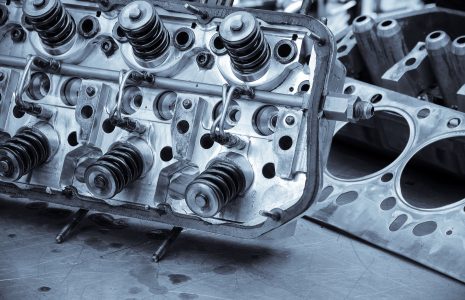
Step 5: Removing the Cylinder Head
Pull off your valve cover(s) to expose the valves and the head bolts. For a pushrod motor, make sure to loosen the valves and remove the push rods first. When loosening the head bolts we recommend loosening them in the tightening sequence about a half turn at a time to avoid warping the head.
Once you've got the head off, it's important to have it checked for cracks and straightens before installing a new head gasket.
Step 6: Reassembly
All you have to do to get the new head back in place is reverse the disassembly steps. To make reassembling your motor easier, we recommend doing a couple simple but important things:
Labeling
Grab some masking tape and a black marker. Next, label everything as you remove it. When it comes to electrical connections, wrap a piece of tape around each side and give them the same label. We recommend using numbers and labeling in the order you unplug them.
If you really want to get to know your car, find out what component or sensor each connector goes to and label it correctly with its purpose. When removing pipes, hoses or vacuum lines, we recommend labeling both ends of every piece and where it connects so you know exactly where it went. It may seem like as long as you have the right hose it can connect either way, but after years of being installed one way, it's smart to reinstall it the same way to avoid it slipping off or leaking in the future.
For larger components like intake piping or manifolds, we recommend labeling each bolt or nut as you remove it so it goes back in the same location. Sometimes this ends up not mattering, but often different locations are connected with different length bolts or different size nuts. Once the fasteners are all labeled, set them all in a zip-lock bag and tape it to the component they were removed from. Make sure you've got a safe well-lit area to lay all the removed components and keep that area free of clutter.
Take Pictures
Lastly, take lots of pictures. Take a picture before you start the work, take a picture after you remove each component, you may even take pictures of your labels in case they fall off! Pictures are good insurance for an easy reassembly process.
If this whole procedure seems overwhelming to you, you're not alone. There is a reason most mechanics charge a lot of money to replace head gaskets. It's a lot of work and if any small piece is out of place, it can ruin your engine the first time you turn the key.
How Do I Fix a Blown Gasket Without Replacing It?
It may not always be worth it to replace your gasket if it isn't fully blown. Rather than going through the lengthy process above, try using BlueDevil Head Gasket Sealer. BlueDevil Head Gasket Sealer is a formulated, non-particulate head gasket sealer that will form a chemical weld at the leak point in your head gasket, sealing the leak and getting you back on the road without any time spent under the hood. BlueDevil Head Gasket Sealer is safe for your cooling system, easy to use, and guaranteed to seal your leak! Learn more right here!
Seal Your Gasket!
You can also purchase BlueDevil Head Gasket at the following BlueDevil partner stores:
- AutoZone
- Advance Auto Parts
- Bennett Auto Supply
- CarQuest Auto Parts
- NAPA Auto Parts
- O'Reilly Auto Parts
- Pep Boys
- Fast Track
- Bumper to Bumper Auto Parts Specialists
- S&E Quick Lube Distributor
- DYK Automotive
- Fisher Auto Parts stores
- Auto Plus Auto Parts stores
- Hovis Auto & Truck Supply stores
- Salvo Auto Parts
- Advantage Auto Stores
- Genuine Auto Parts stores
- Bond Auto Parts stores
- Tidewater Fleet Supply
- Bumper to Bumper Auto Parts
- Any Part Auto Parts
- Consumer Auto Parts
2 responses to "How to Fix a Blown Head Gasket for Under 60 Dollars"
how to fix a blown head gasket without replacing it
Source: https://gobdp.com/blog/how-do-i-fix-a-blown-head-gasket/
Posted by: zimmerandreas.blogspot.com
0 Response to "how to fix a blown head gasket without replacing it"
Post a Comment